Steel Crossfire Domination Tips
Capture points, rotations, and transform plays that win matches.
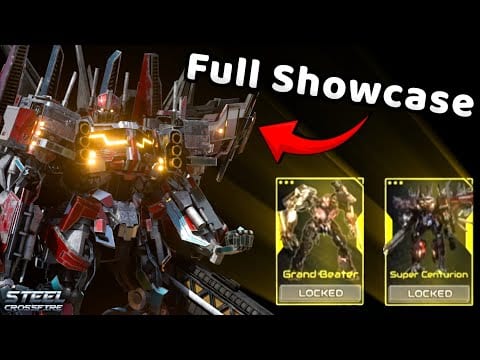
Domination is Steel Crossfire’s objective mode on Roblox where Valorians and Reavers fight for rotating capture zones—not just elimination totals. A team ahead on kills still loses when the enemy holds two points during score ticks. Mastering Domination improves your win rate, Shards per hour, and Season 1 Battle Pass pacing compared to mindless Team Deathmatch queues. This guide covers zone logic, form-specific plays, squad coordination, and common throws.
Domination Rules Recap
Maps feature multiple capture zones—often labeled A, B, C or similar. Standing inside an uncontested or friendly-controlled zone generates score for your team over time. Holding more zones than the enemy accelerates the win condition toward the score cap or clock expiry.
Eliminations matter because dead players cannot cap and respawn timers create temporary manpower gaps. The best Domination teams treat kills as a means to secure points, not the sole win condition. Full mode comparison lives in How to Play Steel Crossfire.
If Domination is your first mode ever, play one or two TDM matches via Getting Started so basic shooting and spawns feel familiar before adding objectives.
Map Control Basics
Two-point rule — Holding two zones beats trading one-for-one kills on a third lane. When your team owns two caps, force enemies to split rather than chasing a distant third point solo.
Spawn advantage — Winning teams spawn closer to contested zones. Snowballing is real—secure early caps to shorten rotation paths mid-match.
Power positions — High ground near a zone lets Bots cover the circle while Jets harass approach lanes. Learn each map’s sightlines during TDM warm-ups.
Form Roles on Objectives
Bot: Hold and Stabilize
Bots anchor capture circles with accurate fire from cover. When a zone is 50% contested, the player in Bot form usually wins the DPS check if they pre-aim common entries.
Bot responsibilities:
- Stay inside the zone circle when safe—partial presence often counts.
- Call out enemy Vehicle rushes before they crash your stack.
- Save abilities for confirmed enemy commits, not poke damage.
Centurion, Hardline, and Bastion excel here; see How to Transform for kit-specific holds.
Vehicle: Crash and Confirm
Vehicles break stalemates. When two Bots trade chip damage forever, a Vehicle entry forces movement—or free damage on panicked transforms.
Vehicle responsibilities:
- Rotate between nearby zones faster than Bot foot speed.
- Ram into circles when the enemy count is one or two, not four.
- Leave the point after confirm if Jet cooldown is up—do not sit as a giant target.
Beater and Grand Beater players should pair with teammates who can clean up after the crash.
Jet: Touch, Harass, Rotate
Jets contest vertical angles and rotate faster across elevation. The classic Domination Jet play: approach from above, drop into Bot on the point for the cap tick, transform out before focus fire deletes you.
Jet responsibilities:
- Flank lanes Bots cannot see from the circle.
- Punish enemy Vehicles stuck in animation after a bad ram.
- Skip fights that do not affect the active zone timer.
Revv and Pointrunner players often Jet between caps; practice in How to Transform before ranked-style lobbies.
Rotation Strategy
When a zone rotates or becomes neutral:
- Call the next point — Voice or quick chat: “B next.”
- Send Vehicle first if the lane is open—speed beats walking Bots.
- Bots follow to stabilize once the crash disrupts defenders.
- Jets cover cross-map flanks so enemies do not back-cap your old point.
Rotating as a trio beats three solos each chasing frags on different sides of the map.
Valorians vs Reavers Coordination
Faction identity does not change capture rules, but spawn sides define default rotation paths. Valorians approaching from the east should mirror Reaver timings when you swap teams—study both spawns in custom or low-stakes TDM.
Discord groups from Marmot’s Oven often run six-stack Domination with assigned roles: two Bot anchors, two flex, one Vehicle commit, one Jet flank. Solo queue players can mimic this by sticking to the player who caps most consistently.
Shards and Battle Pass Synergy
Domination pays strong Shards when you win or perform on objectives. Pair wins with Active Codes boosters during grind sessions. Objective XP also feeds Season 1 Battle Pass tiers faster than empty frag games.
If your Shards per hour feels low despite wins, verify you touch zones—some payout logic rewards capture participation, not only top elimination counts. Details shift with patches; How to Get Shards tracks farming meta.
Character Picks for Domination
Not every TDM fragger dominates objectives:
- Hardline / Bastion — Zone anchors with sustain.
- Beater / Grand Beater — Vehicle confirm on tight circles.
- Pointrunner / Revv — Jet rotation and cleanup.
- Centurion — Flexible fill when roster is thin.
- Super Centurion — Premium all-rounder if Shards budget allows—check Best Starters before buying as your first pick.
Common Losing Patterns
Triple split — Three zones, three solo players, zero caps held during ticks.
Kill chasing — Top frag on a loss because the team never held two points.
Vehicle ego — Ramming four enemies alone without follow-up.
Jet tourism — Flying map-wide without ever entering active zone circles.
Ignoring codes — Grinding Domination without Active Codes boosters while complaining progression is slow.
Fix one pattern per session; Domination IQ climbs quickly with review.
Advanced Plays
Fake rotate — Two players show Jet/Vehicle toward C while Bots sneak B. Works against teams that over-respond to minimap pressure.
Last-second cap steal — Vehicle into neutral zone during enemy team fight elsewhere; one tick before score flip wins rounds.
Respawn timing — Die on purpose only when a zone is lost and respawn syncs with the next rotate—avoid trickle feeding.
Controls for Objective Play
Domination demands fast transform inputs under circle pressure. Remap keys using Controls so Bot → Vehicle → Jet sequences do not fumble during overtime caps.
Related Guides
- How to Play — TDM vs Domination scoring
- How to Transform — form combos on points
- Getting Started — first matches
- How to Get Shards — post-win farming
- Season 1 Battle Pass — pass XP from objectives
- Active Codes — boost Domination grind sessions
Frequently Asked Questions
Quick answers to the most common Steel Crossfire questions.
How do you win Domination in Steel Crossfire?
Hold more capture zones than the enemy during score ticks. Kills help by removing defenders, but two controlled points usually beat a team with more eliminations and zero caps.
Which form is best for capturing points?
Use Jets to approach safely, Bots to hold and cap with accurate fire, and Vehicles to crash stalemates. Most successful plays chain two forms in one rotation.
Is Domination better than TDM for Shards?
Domination often pays more when you win and participate on objectives. Check How to Get Shards and redeem Active Codes boosters before long Domination sessions.
Should solo players queue Domination?
Yes, but stick to teammates who move toward points. Mute toxic chat, follow cap callouts, and read this guide's rotation section to avoid triple-split losses.
What robots work best in Domination?
Anchors like Hardline and Bastion hold zones; Beater and Grand Beater confirm with Vehicle crashes; Pointrunner and Revv rotate with Jets. Super Centurion flexes all roles if unlocked.
Does Battle Pass XP count from Domination?
Yes. Completed Domination matches grant pass XP, especially when you capture zones. Pair matches with Season 1 Battle Pass tier goals for efficient progression.